

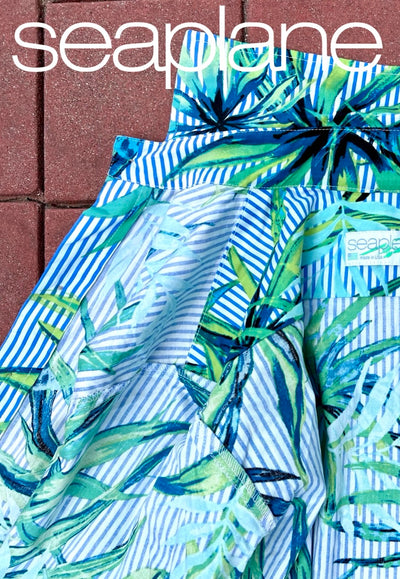
How we make 'em, the Seaplane Shirt production process
“How’d you get into shirts?” we’re often asked at shows. The answer is they’re expressive, more forgiving than pants, and not too complicated to make.
So, by popular demand, here’s a crash course on the shirt production process.

DESIGN
In 2011 we started with a collection of vintage shirts. Our shoulder pleats and side curve, adapted from a bespoke English piece, give space for motion while remaining trim of line. Similarly, collar, cuffs, sleeve shape and hem are purloined from favorites.
If there’s a perfect wheel out there, why reinvent it?

PATTERNMAKING
Although it can be hard to spot differences, our dress shirt production process evolves with almost every cut, based on customer feedback and our experience on the road. Our patternmaker, Eng Gloninger, translates our instructions (i.e., “higher shoulder”) to seek the best compromise across the hundreds of different materials we use. When we make a change, Eng corrects pattern elements (i.e., collar stand or total sleeve length) that she knows will be impacted. Then she passes those elements to her husband, Andrew, to be digitized, graded and marked.

GRADING
Starting with our sample, size large, Andrew uses computer aided design to expand or contract the pattern to 6 additional sizes, creating subtle shape changes in each element of the shirt.
At Seaplane’s start, for simplicity we made only small, medium and large.
Later, as we observed our fit on clients at shows, we added 4 more sizes.

GROUPING
Because our remnants come in different widths, HQ’s first step is to group similar widths to cut together in eventual order for marketing.
Then HQ requests markers based on the width of the narrowest fabric in each lot, because you can cut materials wider than the marker (using waste for bow ties), but not narrower.
The cutting ticket is our best guess at size demand for each print.

MARKING
After the pattern has been graded, Andrew creates a marker for each size by laying elements in the most efficient manner possible (while observing constraints like print alignment across front panels).
Andrew has made markers for our longsleeve at 54”, 48” and 44”; our shortsleeve at 54”, 48”, 42”, and 40”; and our tunic at 54” and 48”. Consider that each of 3 styles in 7 sizes has 13 elements — you’ll feel for the cutter!
In narrower cuts, some elements of the larger sizes (such as front panels) may not fit side-by-side, so elements reshuffle. The result is longer markers for the larger sizes — at 44”, our XXL longsleeve consumes 58% more material than the XXS.
 CUTTING
 CUTTING
The cutter’s first step is to mark, usually with masking tape on the cutting table, the length of each size’s marker. Then he lays one layer of fabric between those marks for each unit ordered in each size, staples on the marker for stability, and uses an electric saw to cut right through the pile.
In the shirt production process, although sewers get a bit more efficient, sewing costs as much for the thousandth unit as for the twentieth. Economy of scale, which benefits us all, happens on the cutting table.


buy cialis usa I see you tested starting at 8dpo which is a sure way to drive yourself crazy
Leave a comment